Research shows that 72% of online shoppers will abandon their cart before purchasing. However, 26% of them will come back to purchase later – if retargeting methods are used.
Wishpond

Facebook retargeting is a highly successful form of advertising, consistently driving high conversions at low costs. It’s an integral part of the marketing funnel, and when implemented correctly can generate some serious cash for your business.
However, setting up Facebook retargeting can be tricky if you don’t know what you’re doing. In this article we’ll take a look at what exactly retargeting is, how to set up your retargeting campaigns, how to use the Facebook Pixel, and much more.
Grab a coffee, settle down and strap in for this guide to Facebook retargeting for eCommerce.
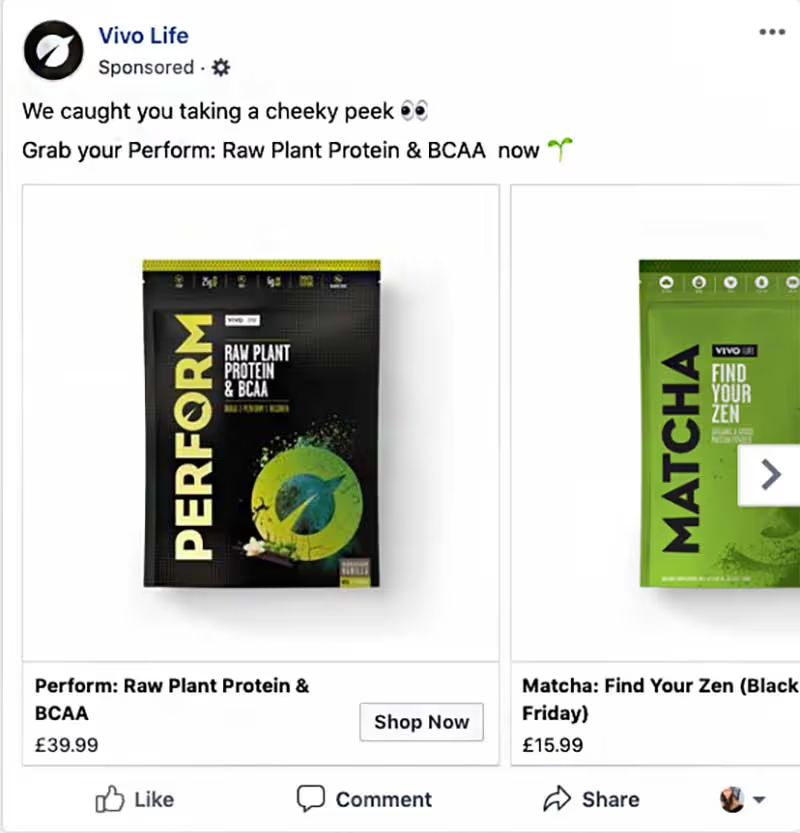
What is Facebook retargeting?
Facebook retargeting is simply a way of targeting users who have already engaged with your brand on Facebook or visited your website.
So, imagine you’ve just looked at some fire trainers on ASOS but you didn’t buy them ‘cause payday’s not for another two weeks. The trainers will mysteriously follow you around Facebook until you cough up the money and buy them.
Retargeting ads can be used to retarget visitors who visited your site but didn’t complete their purchase, but they can also be used to up-sell and cross-sell products to people who have previously purchases. There are tonnes of clever ways to use retargeting campaigns – this is only the beginning.
Retargeting works, and that’s why companies such as fast fashion retailers invest heavily into these type of adverts. However, not all retargeting is good retargeting. We’ll take a look at best practices and common mistakes, so that you too can take advantage of this money tree.
What makes Facebook retargeting so effective?
Facebook retargeting is intelligent, and it’s all powered by this tiny guy called the Facebook Pixel. Each time someone visits your site, they’ll get tracked by the pixel, and their data will be added into a group that you can target with your ads.
This means that you can create ad campaigns that only target people who have expressed interest by visiting your website, and indeed performed certain actions (viewed content, added to basket, initiated checkout, etc.). You can use this data to show them highly personalised ads based on which items they like and what stage they are at in your sales funnel.
A solid retargeting strategy shows that you’re paying attention to the customer’s journey and that you care about their buying experience. More personalised adverts result in a higher chance of conversion.
Sounds pretty great, right? So, let’s get started.
How to get started with Facebook retargeting
Assuming you’ve got your website set up and you have a product catalogue, these are the steps you should take. If you haven’t got a product catalogue set up, get in touch with us and we can give you some help.

Step one: Install the Facebook Pixel
The first step in your retargeting adventure is to install the Facebook Pixel. This is a tracking code that you place on your website, and it’s crucial to running accurate retargeting campaigns.
If you’re not sure whether your site has a pixel already, for example if you’ve outsourced your advertising in the past, you can check this easily by downloading the Facebook Pixel Helper extension for Google Chrome. Install the extension and then visit your site, and click on the helper button. It will show up blue if you have one. You can also troubleshoot your pixel using this tool. We’ll go into this more detail later on.
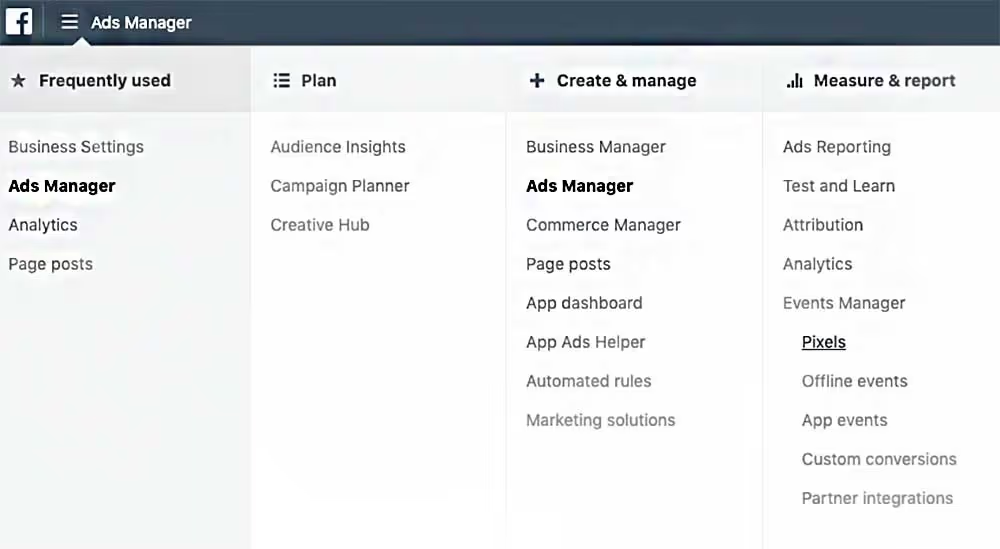
To set up your pixel, go to Facebook Ads Manager and visit the pixels part of the menu. Give your pixel a name and hit “next”.
Your next steps depend on how you’re going to install the pixel on your site. Facebook integrates with Shopify, BigCommerce, WooComerce, Magento, Google Tag Manager, Segment and Wix. Pick your platform and follow the instructions. If you aren’t using any of these platforms, copy and paste the code between the header tags on your site. Side note: If you can’t figure it out, there’s the option of emailing the code to your web dev and letting them take care of it.
You can go deeper here by using the pixel to track specific actions such as Add to Cart, Initiate Checkout etc. The only difference here is that you’ll have to add some extra lines of code, but Facebook has made this pretty simple too. Select the action you want to track and edit the code to match the correct values.
Pro tip: If you’re still puzzled, check out Facebook’s guide on installing the pixel.

Step two: Create a custom audience
Custom audiences are what make Facebook retargeting ads tick. You can use them to test out different audiences to find out the best converting.
Here are some ideas of custom audiences to experiment with:
- Existing customers: Advertise related or complementary products to users who have previously purchased.
- Abandon carts: Hitting those who have abandoned their cart is a great way to create an ad with high conversions. These are hot leads – many people will have abandoned their cart due to getting distracted, but may well still wish to complete their purchase at a later date.
- Email list: Use your email list to target your subscribers, as they have already shown a keen interest in your brand.
- Site visitors that didn’t convert: Anyone who’s landed on site but didn’t convert is a decent opportunity. While it might not be as highly-converting as an abandon cart audience, it’s still likely to be more effective than cold prospecting.
Visit the audiences section of Business Manager to experiment with audiences. Test, test, test until you find that killer one.

Step three: Create a Dynamic Product Ad
Facebook’s Dynamic Product Ads (DPAs) can automate all the fiddly process of creating ads for your products. Here at DMT we love DPAs (and acronyms, apparently), and we’re sure you will too.
So DPAs display personalised ads to your site visitors based on the products they’ve viewed, as well as how close they got to purchasing. All you need to do is select the parameters and create the ad template, and then it runs automatically.
The crucial thing here is that you’ve uploaded your product catalogue to Facebook, as the ads will pull from this. Pro tip: Check out our blog on the importance of using a product feed management tool.
There’s way more we could go into here, but we’re just scratching the surface. Next up, let’s look at some examples of effective retargeting ads, as well as the juicy stuff – those all-important results.
Examples to inspire your retargeting ads
The majority of eCommerce companies run retargeting ads, so it’s fairly simple to have a click around and discover examples from your favourite brands. You can do this either by visiting Facebook’s Ad Library, or simply by visiting your favourite site, adding stuff to the cart and then returning to Facebook without purchasing.
Here are some examples of successful retargeting ads:
Abandon carts
Targeting users who have abandoned their carts has a high chance of success, as they may simple have been distracted, forgotten about their item, or simply needed a little extra push to get over the line.

Offering those users who have abandoned their cart an offer is a common technique used by brands in order to sweeten the deal.

Cross-selling
Using retargeting ads to cross and up-sell is a great way of increasing your customer lifetime value. Below we see Airbnb use this technique to sell experiences to visitors who have booked stays in a certain city.

The results
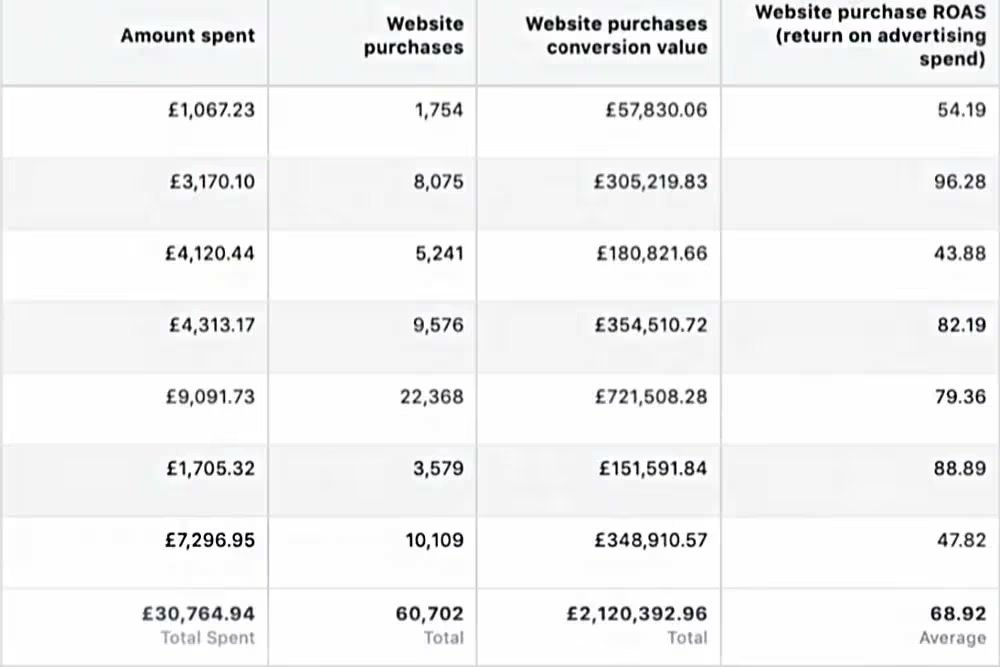
Here’s the business end. Implementing a strong retargeting strategy can deliver huge results. As seen below, the company in question received a return on ad spend of 68 on average. If you learn how to scale this method, it can be VERY rewarding.
Retargeting takes some practice, but once done properly it’s likely to become a core part of your marketing strategy. Whether you take the time to learn these techniques yourself or outsource to an agency (hey there), it’s worth sticking at it until you get it right.
Pro tip – troubleshooting your pixel using the Pixel Helper extension
It’s dead simple to check the health of your Facebook pixel – or indeed whether you have one in the first place. Using the Pixel Helper extension for Chrome can help you spot any errors and whether the pixel is tracking the relevant conversions. Here’s how to do it:
- Download the Pixel Helper extension.
- Visit your website
- Click on the Pixel Helper icon to open up the interface
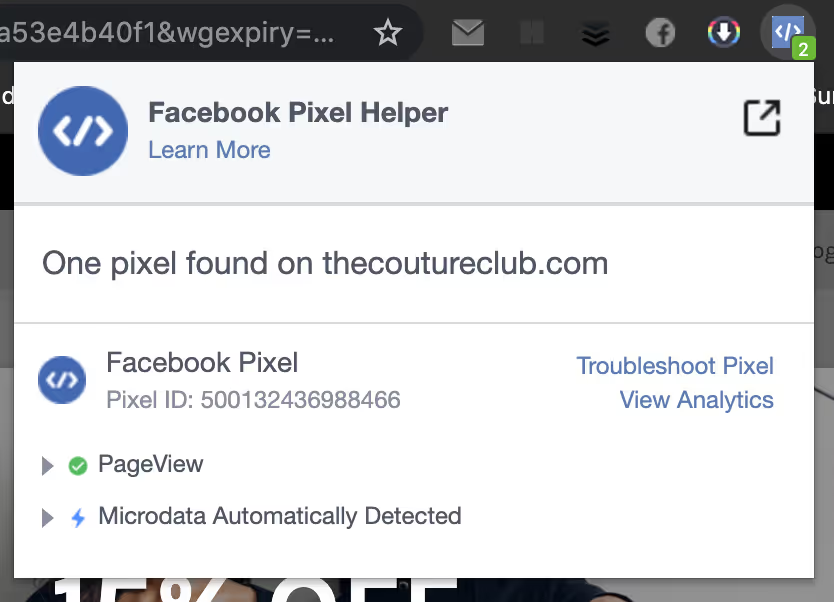
4. Follow your path to purchase (eg. view item, add to basket, initiate checkout), opening up the pixel helper all the way through to check for conversions and errors.


.svg)